The majority of us possess a collection of tools that can be found somewhere, creating a rattling noise. Typically, we allocate a budget of £1000 for a starting training cabinetmaker. It is possible that you might surpass this amount slightly or you could possibly spend a slightly lesser amount.
Saws, chisels, planes, marking and measuring tools, and routers are vital equipment for woodworkers. Despite being a non-hand tool, the small router has become a crucial bench tool for contemporary cabinet makers. Any employer would anticipate you to possess your own router. While there are numerous other tools available, and some may prove advantageous, our general suggestion when starting out is to invest in as few tools as possible. It is recommended to seek informed opinions, physically handle the tools before making a purchase if feasible, and acquire proficiency in using them with confidence.
It is important to consider that new tools will need adjustments and fine-tuning to meet the required standard for accurate woodworking. Consequently, opting for cheaper or second-hand tools can sometimes be deceptive, as they may demand extensive additional effort to reach an acceptable level of quality.
Bench Planes
The bench plane is an essential tool for a cabinetmaker as it acts as an extension of their body while working on the bench. It is used for various tasks such as flattening components, bringing them to their final dimensions, removing planer marks, and fitting joints. In a high-quality workshop, no component would be considered finished straight from the planing machine. It would always be carefully inspected and smoothed using a bench plane, even if lightly, before proceeding to the final stages of sanding and polishing. When choosing a bench plane, it is advisable to opt for either a jointer plane or a fore-plane, denoted by numbers such as No. 8, No. 7, or No. 6 in the Stanley numbering system. In general, a higher number indicates a larger plane. Therefore, it is recommended to try out the tool before purchasing it, as a plane that is too heavy would be strenuous to use, while one that is too light or short would not fulfill its purpose effectively. While some may suggest having a range of bench planes in their toolkit for specific purposes, we have found that for most individuals, having a single bench plane such as those mentioned earlier will suffice for 90% or more of their requirements as a cabinetmaker.
There should be no need to waste time or effort adjusting a new plane to ensure it is completely flat, or getting the blade properly positioned within the plane body.
Our recommendation for purchasing planes is Lie Nielsen, Clifton, and Stanley, in that specific order. At present, Lie Nielsen is known for producing the top-quality planes available in the market. These planes require minimal to no adjustments upon purchase, and are incredibly durable and stable, expected to last a lifetime. Despite being quite expensive, their higher cost covers the convenience of minimal hassle, minimal modifications needed for workshop usage, and exceptional casting quality. Clifton also manufactures planes of decent quality, although they tend to be slightly heavier and require a bit more fine-tuning. While this may not be a significant concern, it is advisable to personally handle the tools to determine which one better suits one’s preferences.
We advise purchasing a second-hand Stanley plane instead if you were planning to buy one. On modern planes, the casting tends to be of low quality, resulting in the plane losing its flatness after just a few weeks, despite your efforts to make it flat for a significant amount of time. This means you will have to start over again. While buying a used Stanley plane (or any used plane, for that matter) can be tricky, older models of Stanley planes were durable and often stand the test of time.
The plane’s blade should last for several years, but it will need to be worked on again in order to become flat and sharp once more.
In addition to these primary bench planes, there are other planes of varying lengths that you might consider exploring in the future. It may also be worth considering a low-angle plane, but this is more of a luxury rather than a necessity. Including a low angle or other planes in your initial shopping list is not essential.
Block Planes and Shoulder Planes
The next plane required is a small block plane. The price and quality of a 60 1/2 Block Plane can differ significantly. Lie Nielsen manufactures a superb 60 1/2, but Veritas and Clifton also offer similar options. While cheaper block planes can be found, they might have drawbacks or require extra preparation time. It is preferable for the plane to have an adjustable mouth as it provides flexibility during use, minimizing vibrations and allowing for more finesse in utilizing the tool.
Shoulder planes are commonly employed for the purpose of adjusting joints, particularly in tighter spaces like the shoulder, allowing for planing precisely up to the corner while staying parallel to the tool’s body. While they may not be utilized on a daily basis, there will be numerous opportunities to make use of these planes, making them an indispensable tool. They offer the ability to trim joints with notable precision. When purchasing a shoulder plane, ensure that the sole is level, the mouth is clean, and confirm that both sides of the plane align perfectly at a 90-degree angle with the sole. If this is not the case, it is recommended to return the plane.
Shoulder planes made by Veritas, Clifton, and Lie Nielsen are all of good quality and it is recommended to have at least one. Additionally, you can find decent second-hand shoulder planes, typically from brands like Record or the older company called Preston. Before making a purchase, ensure that the plane is square and flat.
In terms of shoulder planes, our suggestion is to consider either Lie Nielsen or Clifton. To begin with, a Clifton 410 or a larger Lie Nielsen plane would be sufficient for most individuals.
Other Tools Every Furniture Maker Needs
Tools for Layout
Having a precise layout is crucial in creating high-quality furniture, and it holds the same level of significance whether you’re using power tools or working by hand. This is because regardless of the tools employed, it is necessary to have accurately positioned and squared joints. As a novice woodworker, these tools should be your initial investment.
A tool used in woodworking for making precise measurements and markings is called a marking gauge.
Marking gauges are highly effective in creating a line that runs parallel to the edge of a board, an essential step in accurately setting up tenons, mortises, and the foundation for dovetailing. A cut line surpasses a pencil line as it offers a precise location and path for commencing work with a chisel or handsaw. While gauges equipped with a knife or cutting wheel produce cleaner lines than pin gauges, it is simpler to locate wheel gauges.
A knife used for marking things.
In addition, a sharp marking knife is essential. Throughout my ownership and use of various types, the chip-carving knife has consistently been my go-to choice. Its double bevel allows marking on both sides of the blade, and the bevels span the entire height of the blade (with a triangular cross-section), enabling me to align the blade with the workpiece’s side and create a precise adjacent line. Additionally, the blade’s length, thinness, and rigidity facilitate easy maneuverability in narrow spaces without any bending.
A square that has additional features such as a level, protractor, and scribe for measuring and marking angles and distances is called a combination square.
Having a combination square is essential for drawing or cutting a line at 45° or 90° angles. It is crucial to invest in a high-quality one, such as those manufactured by Starrett, as it will provide accurate measurements from the beginning and retain its accuracy over time. The 12-inch model is particularly versatile, allowing for marking wide boards or multiple pieces simultaneously. It is recommended to start with this size, but I have discovered that the smaller 6-inch version is equally convenient. Due to its compactness, it is more comfortable to hold and easier to use when outlining joints in narrow spaces and across the end grain.
A tool used for measuring and transferring angles.
A bevel gauge is helpful for transferring angles from plans to workpieces and adjusting table saw blade angles due to its lockable and adjustable blade. One of its primary uses is for laying out dovetails, making it a suitable tool for the task. When purchasing a bevel gauge, ensure that the blade securely locks in place to prevent unintentional movement. Additionally, the nut used for locking should not hinder the usability of the gauge, which is a common issue with wing nuts found on some gauges.
Tools for Joinery
Craftsmanship is often recognized by the presence of dovetails, and despite the laborious process of cutting them by hand, the outcome is undeniably valuable. Nevertheless, even if power tools are employed for all joinery cuts, it is still optimal to use hand tools for precise adjustments. To achieve impeccably hand-cut dovetails and snug-fitting tenons, the following suggestions are advised:
A dovetail saw is a type of saw designed specifically for making precise cuts in woodworking joints such as dovetails.
There are two choices available for a dovetail saw: a Western backsaw or a Japanese pull saw, known as a dozuki. Starting with Japanese saws is recommended as even the cheaper ones come extremely sharp. Nonetheless, the pistol grip of Western backsaws is advantageous as it helps position your hand and arm for making straighter cuts, resulting in more reliable and precise outcomes compared to a dozuki. However, if you opt to purchase the dozuki initially, there is no need to worry as it will still serve multiple purposes, such as cutting small components and flush-trimming pegs.
A tool that is used for cutting curves and irregular shapes in wood or metal.
Using a coping saw to remove the waste between pins and tails before chiseling to the baseline is not something that needs to be handled delicately. This method can save a significant amount of time in comparison to solely using a chisel to chop away all of the waste. Coping saws have the advantage of both cutting quickly and providing excellent maneuverability between pins or tails. Additionally, they have inexpensive and easily replaceable blades, ensuring that a sharp one is always readily available.
Chisels are tools used for cutting or shaping materials.
Begin with a minimum of four chisels: 1/4 in., 3⁄8 in., 1/2 in., and 3/4 in. The Irwin Blue Chip set includes six chisels and offers great value, as it includes an additional 5⁄8-in. and 1-in. chisel along with the initial four. Avoid chisels measured in millimeters, as they may have slightly different widths compared to their U.S. equivalents, causing frustration when working with mortises or grooves made with fractional bits. Once you have the basic set, consider adding a wider chisel (ranging from 11/2 in. to 2 in.) for tasks such as paring and chamfering in confined areas.
Tools for Shaping and Smoothing
Starting with proper surface preparation is essential for achieving a high-quality final result, and the most efficient method to eliminate machine marks and tearout is through the use of hand tools. The smooth and precise flat surfaces and neatly beveled edges produced by hand planes cannot be replicated with a sander. To ensure optimal results, it is recommended to have both a smoother and a block plane at hand. Additionally, a card scraper is beneficial for tackling challenging wood grain, while a spokeshave is perfect for tidying up curved surfaces.
A card scraper is a tool used for smoothing and removing imperfections from wood surfaces.
When dealing with woods that have intricate grain patterns, such as tiger maple, or when there is minimal tearout on an otherwise smooth board, a card scraper proves to be an invaluable tool. Unlike a hand plane, a scraper does not carry the risk of causing tearout. Even after using a hand plane to smooth a surface, I frequently utilize a card scraper to eliminate any flaws.
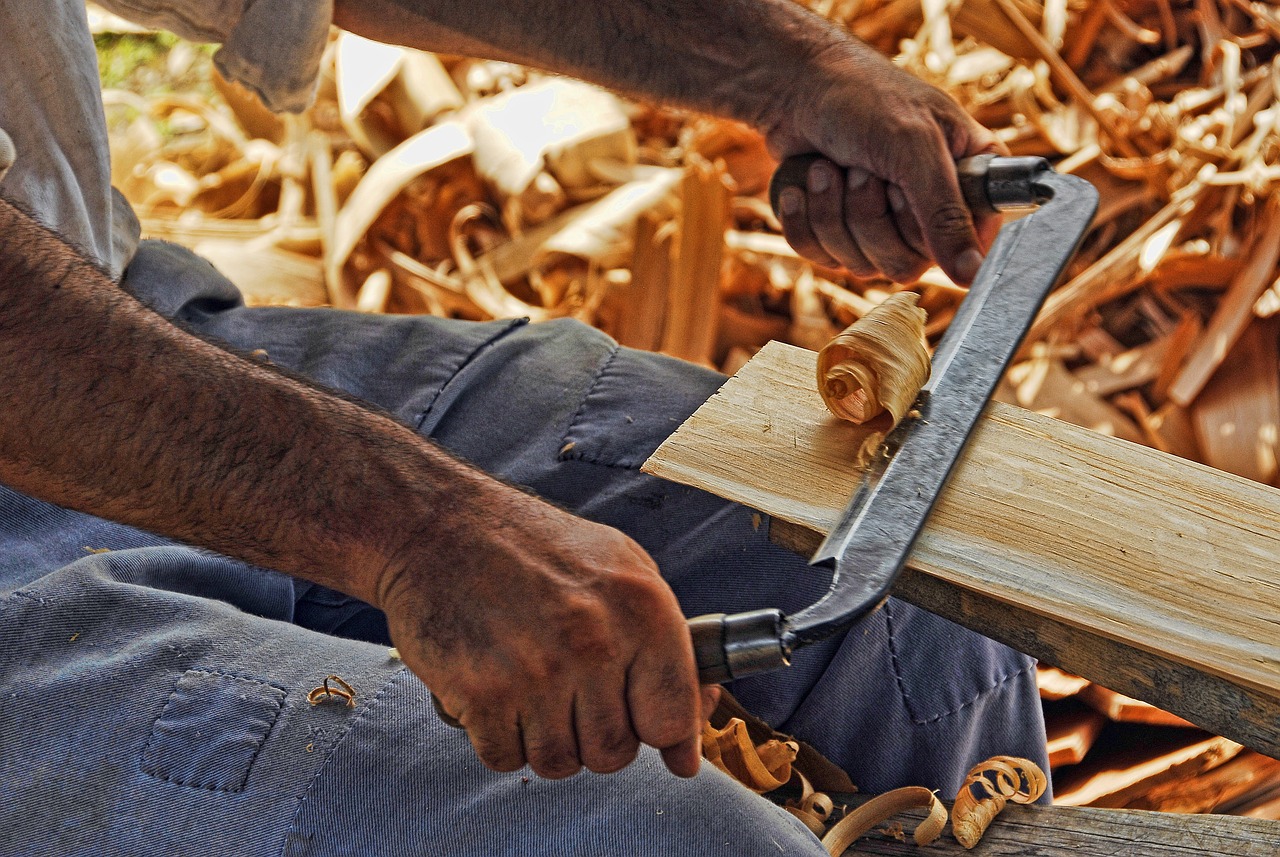
A spokeshave is a tool used in woodworking for shaping and smoothing curved surfaces.
Often underestimated, the spokeshave is an unconventional tool that is commonly overlooked in the workshop. Despite its peculiar appearance, this tool is essentially a compact handplane with handles positioned on its sides rather than its front and back. When it comes to smoothing band-sawn curves, nothing is more efficient. Although the tool can be acquired with either a flat or curved sole, I suggest the flat sole as it functions effectively even on surfaces with a concave shape.


